● Annotation Problem
● Calculator Tool
● Checkbox Problem
● Chemical Equation Problem
● Circuit Schematic Builder Problem
● Conditional Module
● Completion Tool
● Custom JavaScript Problem
● Drag and Drop Problem
● Dropdown Problem
● External Grader
● Full Screen Image Tool
● Gene Explorer Tool
● Google Calendar Tool
● Google Drive Files Tool
● Google Instant Hangout Tool Rich Diversity of Assessments
● Iframe Tool
● Image Mapped Input
● LTI Component
● Math Expression Input
● Molecule Editor Tool
● Molecule Viewer Tool
● Multiple Choice Problem
● Multiple Choice and Numerical Input Problem
● Numerical Input Problem
● Office Mix Tool
● Open Response Assessments
● Oppia Exploration Tool
● Peer Instruction Tool
● Periodic Table Tool
● Poll Tool
● Problem with Adaptive Hint
● Problem Written in LaTeX
● Protex Protein Builder Tool
● Qualtrics Survey Tool
● Randomized Content Blocks
● Recommender Tool
● Survey Tool
● Text Input Problem
● Word Cloud Tool
● Write-Your-Own-Grader Problem
● Zooming Image Tool
● MathJax
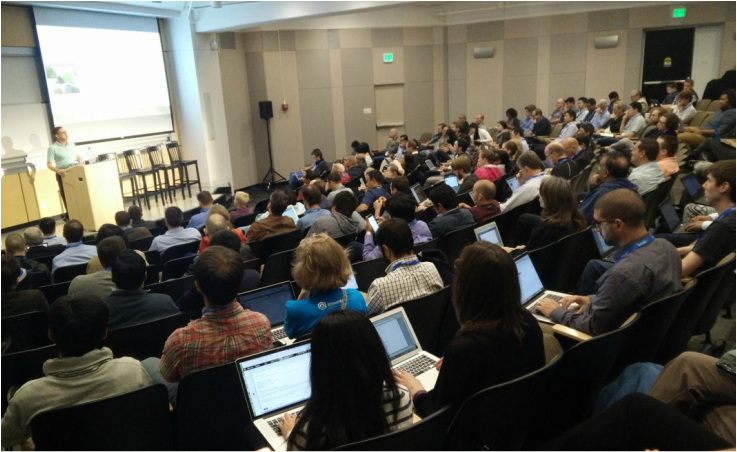
Open edX 2016 Conference: Day 1 Run-down
|
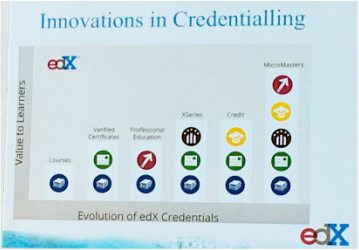
Anant Agarwal kicked off the conference, covering topics like how credentialing is evolving on edX, from Course completion in the early days to the new trend of Micro Masters becoming the word of the day.
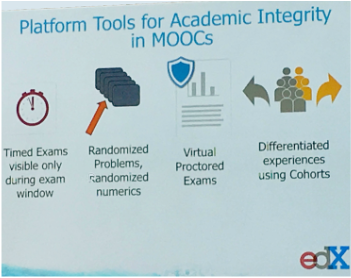
Anant also covered Academic Integrity tools, including virtual proctoring, a topic very close to Perpetual Learning as we’ve worked to enable proctoring on FunMOOC using ProctorU’s services.He also recited an anecdote of how an Indian student Akshay Kulkarni recognized him on his trip to India, and had come up to Anant and thanked him for edX, which he attributed as the main catalyst towards eventually landing a job at Microsoft. |
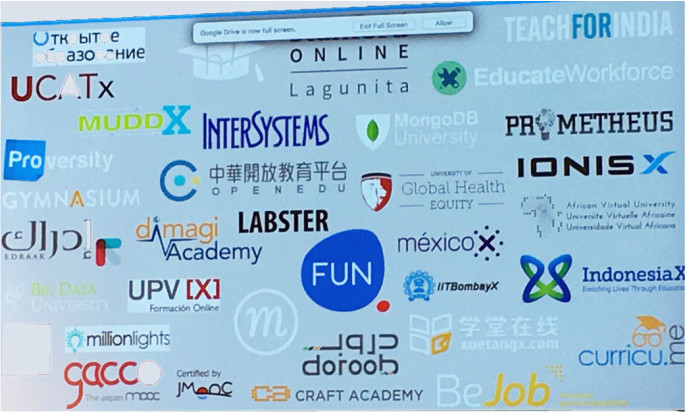
Joel (Dev Manager), Mark (CTO) and Eddie (Chief Architect) from the edX team spoke about the state of Open edX and Development and Architecture priorities and initiatives. The sheer number of (known) Open edX sites out there is accelerating each month.
Lunch in the courtyard of the Lathrop Library was another highlight of the day, with the sun hitting the spot after the morning session indoors. While the selection of the food was quite delectable, our personal favorite was the lemon tart not to mention the supply of fresh lemonade through the sunny day.
We got back to attending several interesting sessions in the latter half of the day. Regis Behmo from Funmooc demystified the Open edX source code in his session Open edX 101: A Source Code Review. Steven Burch from StanfordX spoke about dogfooding Open edX, with a few often over-looked and very pragmatic soft aspects of testing and building good software. The team from Applied Materials discussed the usability of Open edX in a corporate environment and highlighted the gaps and how they’ve been able to work through them. We enjoyed particularly the talk from TokyoTech, who showed one of the best applications of edX insights as we gained truly deep insights into learner engagement.
There were several more engaging talks and ‘birds of a feather’ sessions, a more detailed run-down of the schedule here.
We ended the day sipping summer wine under the canopy of (Dogwood?) trees exchanging ideas, planning, dreaming. And with this just being day one, we can’t wait to see what the rest of the event has in store.
Idea Kit: A Good Place To Start
Even the best have humble beginnings. Brilliant companies with amazing user interfaces, in-genius advertisements, beautiful animations of the big screen, have all found themselves in one situation: Staring down at a blank piece of paper with a pencil in hand. With technology becoming more integrated with our lives and staring at computer screens for nine hours a day is no longer abnormal, it’s hard to come up with ideas when our processes have become this mechanical. The ability to come up with fresh and new ideas often occurs not in front of a screen, but when you revert back to the more humble and basic methods.
Here are three key benefits for using our template:
- Easier to understand your design process
- Enables clearer thinking
- More flexible way to layout your ideas
In order to express this importance of integrating paper and pencil into your design process, we made a simple idea kit in hopes of enabling lots of wonderful ideas to come to life. Happy creating!
|
|
||||
Revolutionizing Code Education with Swift Playgrounds
For most beginners coding can be overwhelming; staring at a computer screen riddled with numbers and letters often discourages them from learning at all. When Apple released Swift two years ago however, they had high hopes for solving this problem and expanding and appealing to the newer generation of developers. Swift as a language is powerful and intuitive while at the same time providing a fun and interactive way to write code. Since then, over 100,000 apps have adopted the lighting fast and easy to learn language, notable ones include Twitter, Strava, Lyft, and Behance. Since it’s release as Open Source in December, the degree of adoption has been phenomenal, ranking as the number one project language on HipHop.
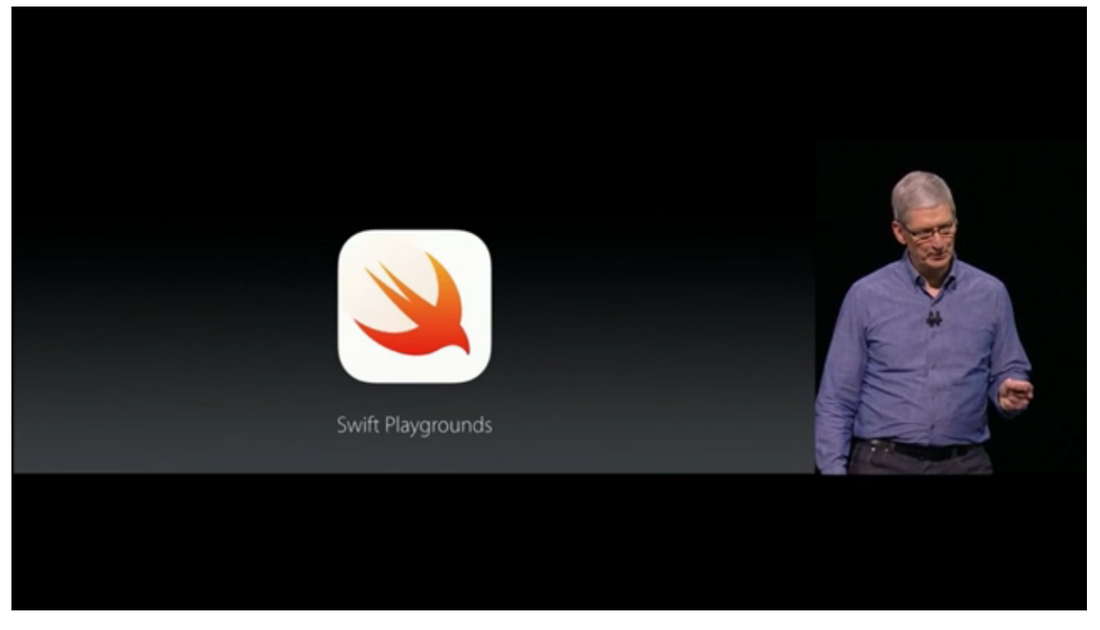
Apple maintains this goal of bringing more people into coding by revealing of Swift Playgrounds at Apple’s annual developer conference today. The app solves the critical problem of coding not being fun nor interactive by taking advantage of Swift’s inherit simple learning structure and pairing it with a game-like platform that includes an avatar(Bite) and several different mazes that one can go through. It offers levels and puzzles where you control Bite with code, and the farther you go the more advanced the concepts become. Other beneficial features of the game that makes it fun to learn the basics of Swift include high quality graphics, smooth transitions and animations. Here’s a preview of the app.
|
The app will be released to developers today, Public Beta in July, and on the App Store when iOS 10 ships in the fall. The price? Absolutely free. As important as coding is and has been, it still lacks presence in classrooms across the country. By making Swift Playgrounds free, it would be a monumental step towards implementing code as a required language in education or as Apple CEO Tim Cook expresses during the conference, can “profoundly impact the way kids learn code”.
|
Datadog: App Monitoring’s New Best Friend
In the previous post we discussed the basics of port/latency monitoring using AppBeat. In this post we will discuss full stack server monitoring using a tool called Datadog.
Datadog is one of the leading appli
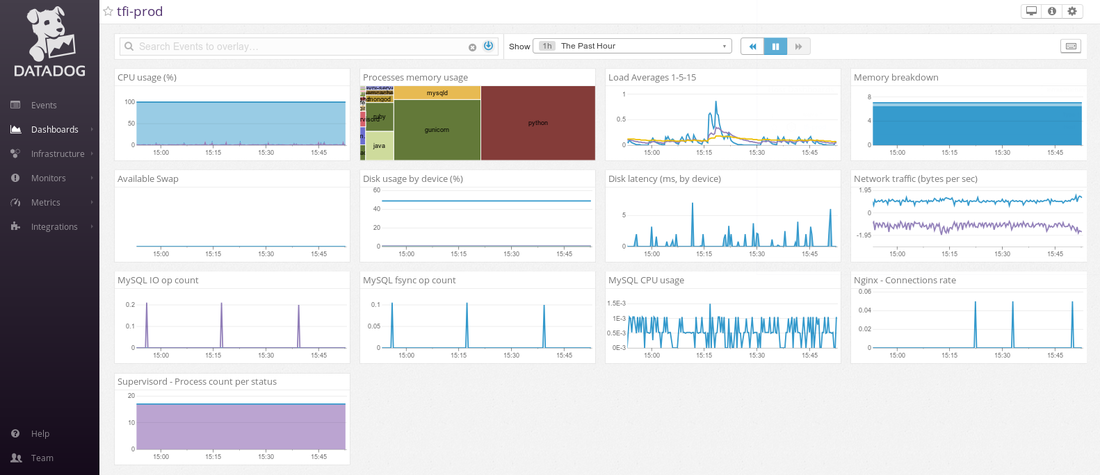
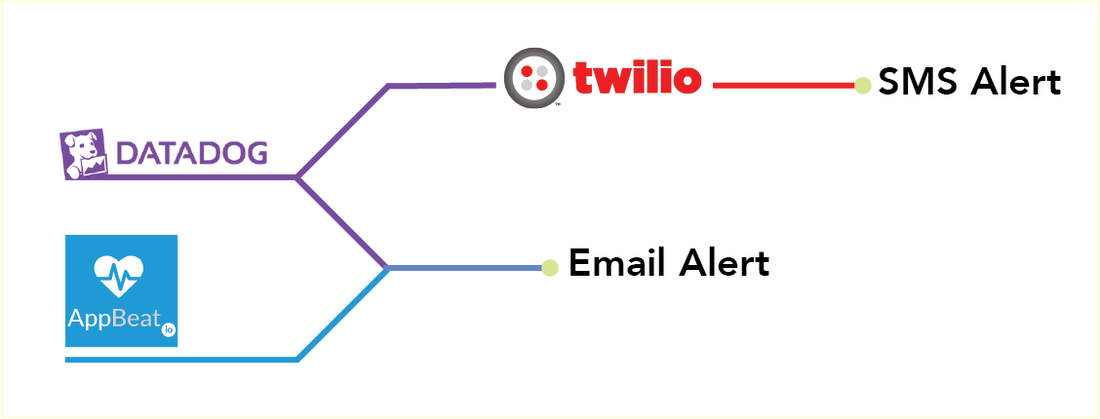
cation performance monitoring SaaS tools. We will cover how to setup a monitoring agent on your servers and configure Datadog to display metrics, trigger alerts, and even integrate with twilio to send SMS when there is a problem with the server.
Stack
The first thing to do is to sign up for the Datadog service here. Once completed, you can integrate your server into their dashboard by running the Datadog monitoring agent on your server as follows:
- Integrate Datadog into applications it supports; you can see if your software is supported by Datadog here
- You can install their agent directly into your machine as root.
- You can run their monitoring agent inside a docker container.
It’s a cross-platform monitoring agent that works on both Linux and Windows and integrates over 100 services. The full list is available here.
Installing the Datadog agent on the server
The installation procedure is pretty simple, once you login to your server:
- Go to Agents under the Integrations panel or go to this link:
- Elect your operating system and follow the instructions on the page to install datadog agent on your server.
E.g. on my ubuntu machine I had to run the following command:
DD_API_KEY=xxxxxxxxxxxxxxxxxxxxxxxxxxxxxxx bash -c “$(curl -L https://raw.githubusercontent.com/DataDog/dd-agent/master/packaging/datadog-agent/source/install_agent.sh)”
Once the agent is installed on your machine, go to the Datadog dashboard and see if any events appear on the event log.
You can find the default dashboard panel of your system at the bottom of the Dashboard List under the “Host Dashboards” section.
Integrating Twilio into Datadog
Twilio is an telecommunications SaaS platform where your can send SMS and make calls like as you would on a mobile phone.
To integrate Twilio, follow this tab path to get to the configurations tab:
- Open Integrations under the Integrations panel on the side panel
- Select “Webhooks”
- Select the Configurations tab and scroll down to the bottom of the popup
To test if the Twilio integration is successful:
- Go to the Events page and input @webhook-twilio into the event box.
- Click post to trigger the webhook and if everything is configured correctly you should receive an SMS.1.
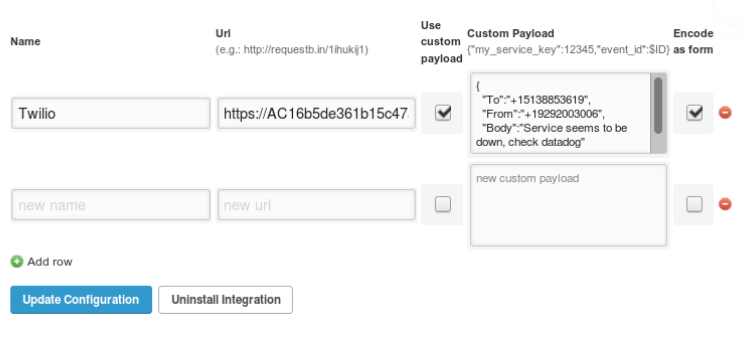
In order to proceed, you will need a Twilio Account SID and Auth Token which you can find under “Account Summary” on the Twilio Console.
- Copy both and replace them with ACCOUNT_SID and AUTH_TOKEN in the following URL:
- https://ACCOUNT_SID:[email protected]/2010-04-01/Accounts/ACCOUNT_SID/Messages.json
2. Following, construct this message in twilio API format.
{
“To”:”+1XXXXXXXXXX”,
“From”:”+1YYYYYYYYYY”,
“Body”:”Service seems to be down, check datadog portal”
}
*(XXX) XXX-XXXX is your phone number and (YYY) YYY-YYYY is the twilio number.
3. Copy & paste the message in the content payload and check the “encode as form” box
4. Add the URL listed above into the URL field and “update the configuration”.
5. Create a new monitor and select the metrics you want to monitor and when it asks “What’s happening”, enter “@webhook-twilio” and save the monitor.
|
To test if the Twilio integration is successful, go to the Events page and input @webhook-twilio into the event box. Click post to trigger the webhook and if everything is configured correctly you should receive an SMS.
That covers how to monitor your app using Datadog and how to get notified. Note that the value you get out of Datadog is similar to what you would get by using a tool like New Relic which is a great tool, but comes with a premium price more suited for large corporations. For startups or others on a budget, Datadog could be your best friend. |
Effective Web App Monitoring at Low Cost
Possibly the worst part about running an online service is when it crashes, or worse, being unaware that it crashed. This post pertains to how to monitor your service effectively at a low cost. The key things to know about your service includes three critical questions, and our suggested effective solutions to them.
AppBeat is a service that monitors the ports and their latency from external servers from different locations on the globe and reports the analysis results on your dashboard; every day and every hour. Some benefits of using this service include the comforting knowledge that your apps are constantly being monitored and watched over, the high availability of services which often equates to high customer satisfaction, the detection of slow response times, and the critical prevention of unexpected outages. What’s more, it can integrate with other services like Slack and Pagerduty to report alerts on these.
Datadog on the other hand is a service that monitors various parameters on the server including CPU load, memory consumption, network I/O, disk IO, temperature, and many more. Benefits of this service include aspects in Integrations, Dashboards, Correlations, Collaborations, Metric Alerts, and Developer API. While there is a lot of information regarding all of these aspects, one of the main distinguished features include the fact that it sends data to the dashboard where the user can see it and configure/trigger alerts if anything goes wrong.
Regarding the low cost part mentioned above, another advantage of both Datadog and Appbeat is that they have free plans, so the setup cost for monitoring solutions is zero. This is a great alternative to paid services like Pingdom and Newrelic (which are fine services in their own right), making it a good option for startups with tighter budgets.
Before we start the set-up process for the monitoring system we have to identify a few things first, such as the email and mobile number you want to send alerts to and a credit card to sign up for Twilio (you only pay per-user at a nominal cost). We will first start off for cases with a use-purpose like running a blog, where just using Appbeat is good enough. We’ll cover Datadog and Twilio in a future posts.
How to setup Appbeat
- Create an account with Appbeat.io
- Verify your email address
- Following this, go to “Services & Checks” on the left panel in your dashboard.
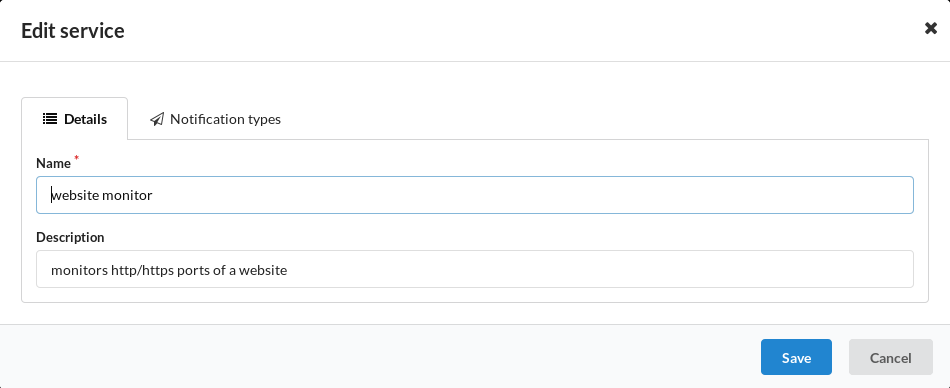
- There you’ll see an option to add a new service. Click on it and your screen should look like the one below,
- Fill out the following form and click “Save”.
Once you’ve added the new service, the next step involves adding checks that are to be grouped under that service.
- Click on the tab labeled “Checks”
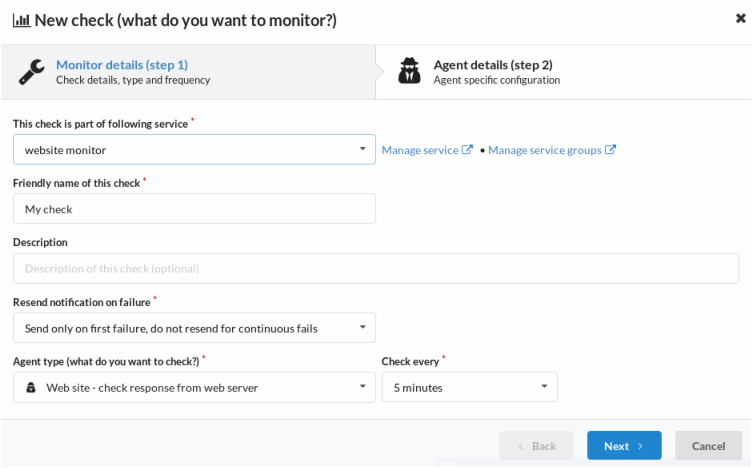
- Click on “Add a new Check”. You’ll get a screen that asks for information about the check
- Fill it out and click “Next”.
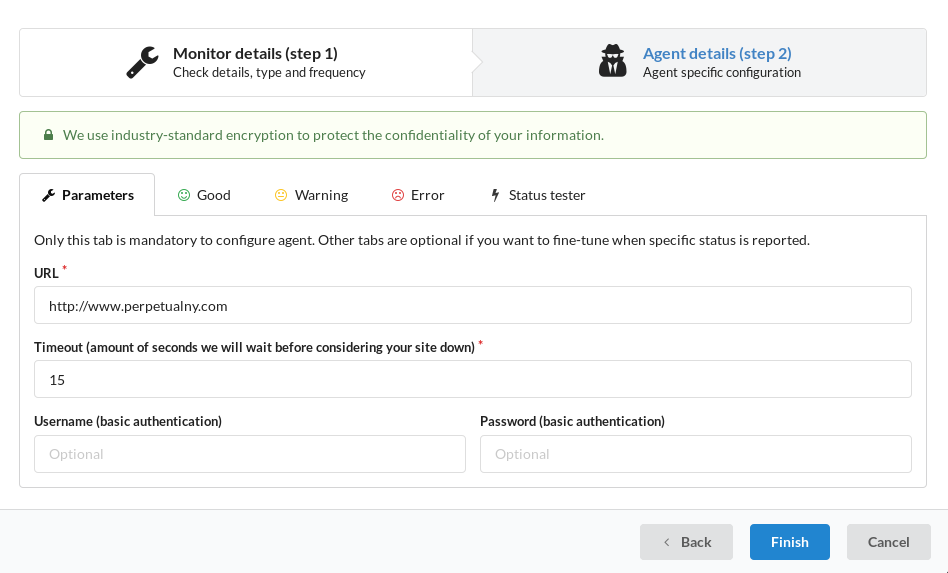
- There it will ask you to input the URL that’s to be monitored and the time interval at which it is monitored. (suggested interval time: 5 mins)
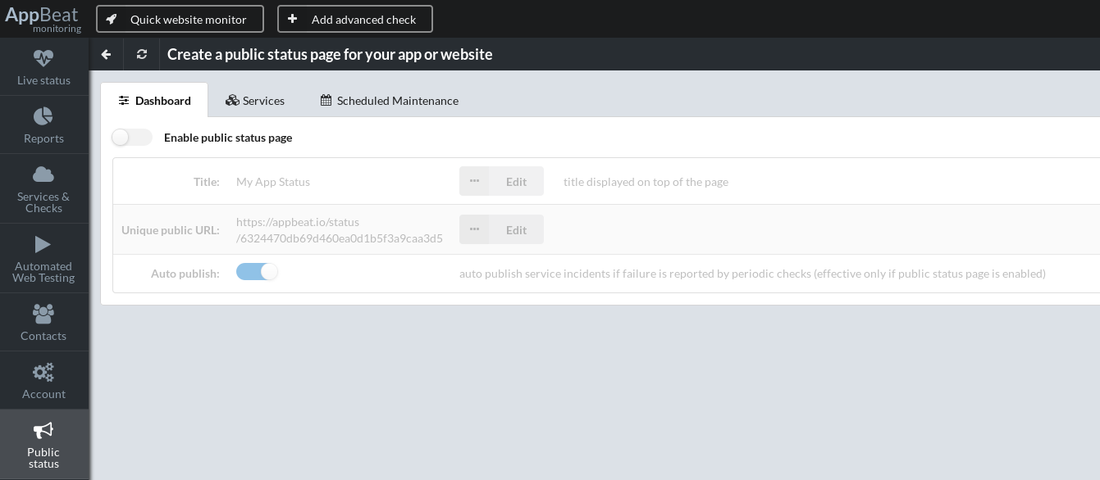
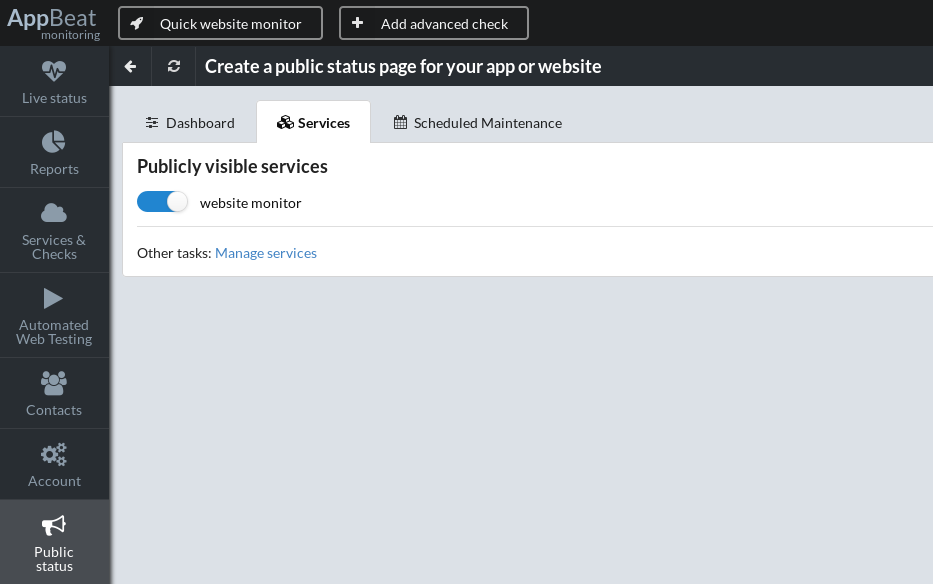
If you want the public to see if the services are operational or not, you can create a Public Status page. This can be easily made in the “Public Status” section in the side panel. Simply:
- Enable the public status page
- Click on the “Services” tab on the same page to select the services you want to display to the public.
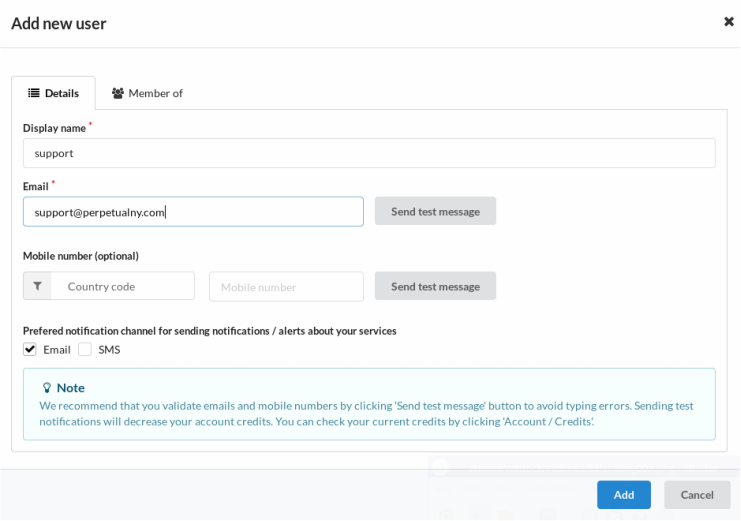
If you want to add new users to the site, where they can also look at the data received, they can be added through the “Contacts” section in the side panel.
- Click on “add new user”
- Input the email address and mobile number
- Click whether Email or SMS is the more preferred way to be notified.
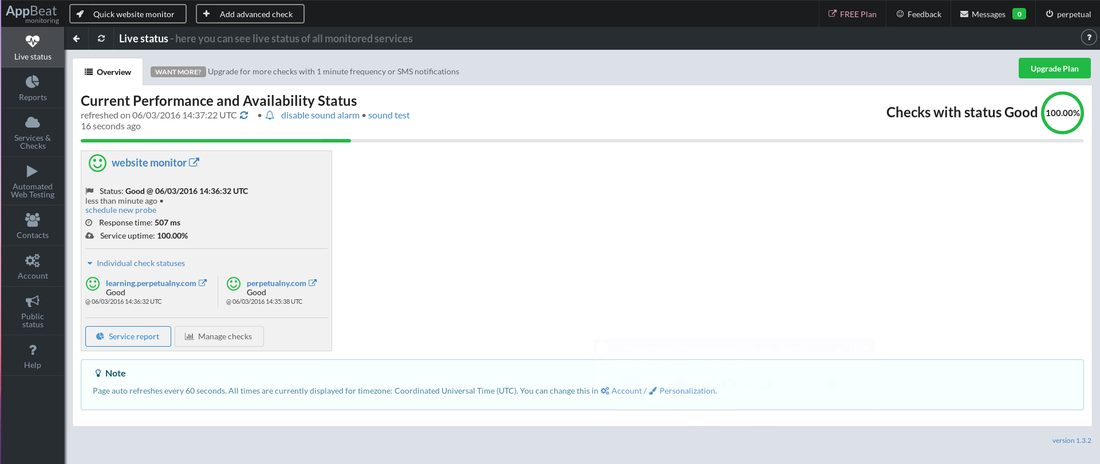
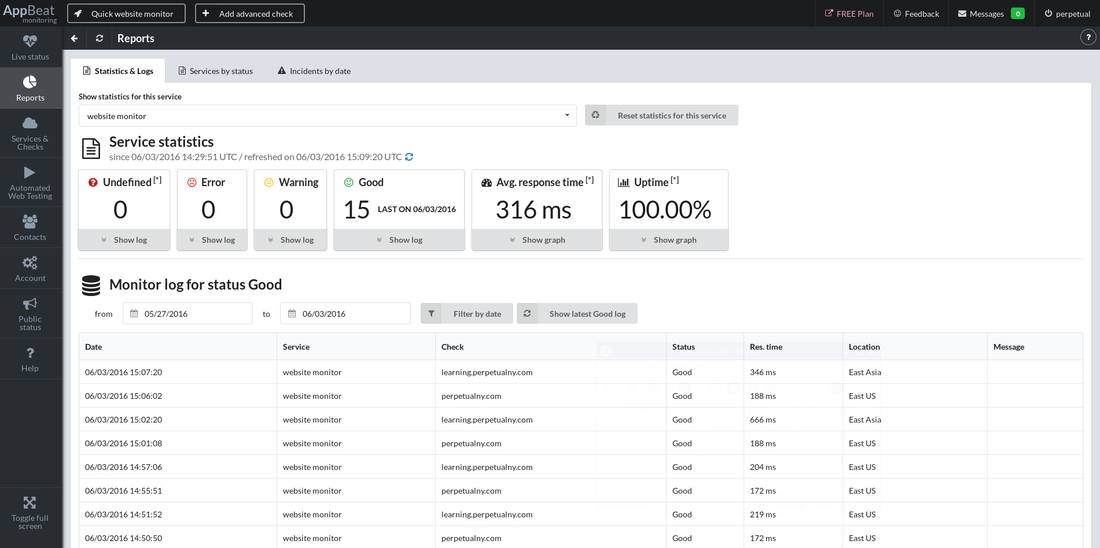
To see the monitor logs and service statistics, you can access this in the Reports section in the side panel.
- Click on “show log” on one of the categories i.e. error, undefined, warning, good to see the logs.
Concluding thoughts
A UX designer’s toolkit
|
While the bulk of the credit when creating a product goes to the vision and innovation of the designer, the execution or the translation of the vision to a palpable product is equally as important. For years, Adobe products such as Photoshop and Illustrator have dominated the design-driven market. However, with the demand for designers rising and the outlets and opportunities expanding into different industries, the number of tools at a designer’s disposal are also increasing.
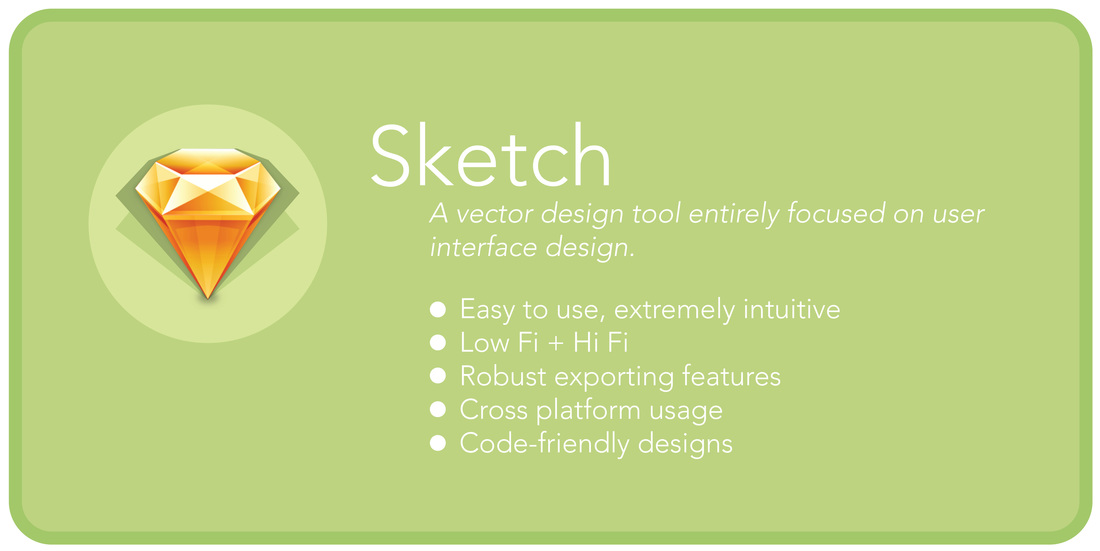
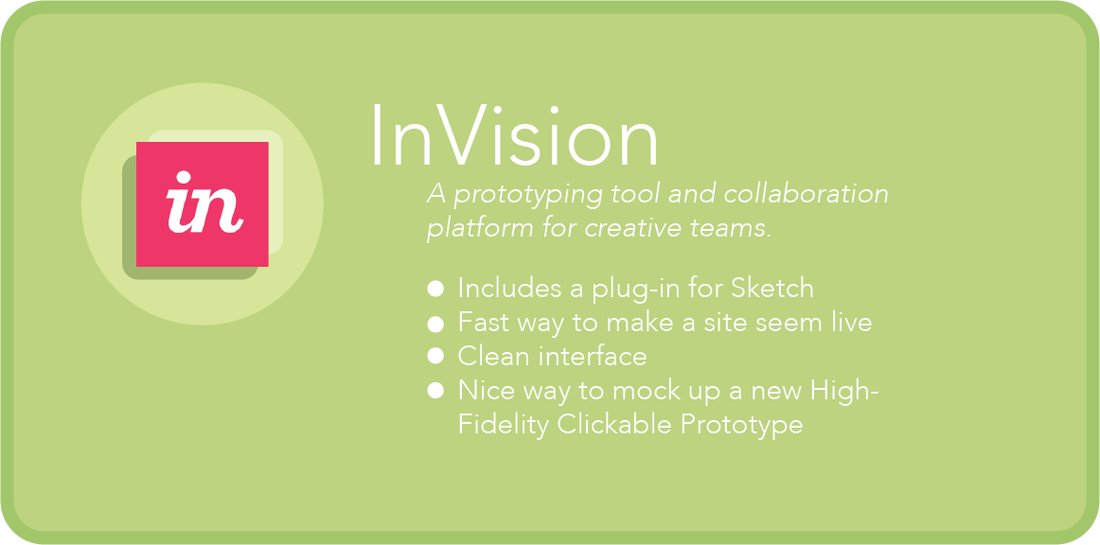
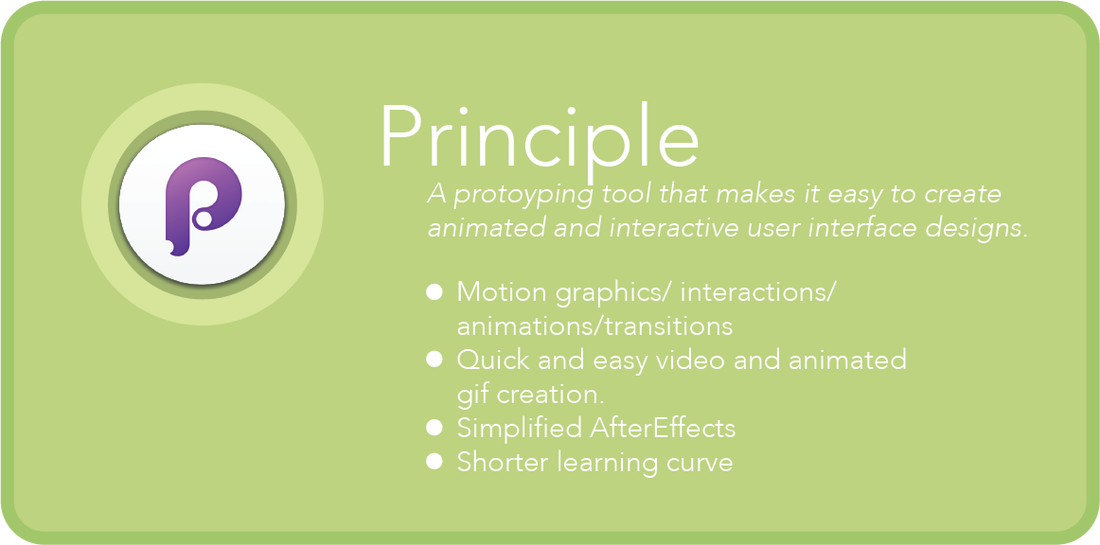
Out of the hundreds of possible tools that a designer can use to design websites and apps, here are the ones that Matt prefers.
|
Facebook Gets Serious about Audio in VR
Even though we’ve made significant progress in constantly expanding our boundaries between what we thought was possible and what wasn’t, one of the most futuristic aspects of technology that’s filled to the brim with untapped potential would be “VR” or “Virtual Reality”. From retail to video games, Facebook has definitely noticed the potential in the market and has made yet another step towards building a virtual reality empire.
Last Monday, Facebook, acquired Two Big Ears, a small startup specializing in audio technology. Founded in 2013, this Edinburgh based company specializes in immersive and interactive audio applications and tools with a focus on mobile and other emerging technologies. A post from Two Big Ears confirmed the merge:
“At Two Big Ears, we’ve been hard at work creating technology and tools that have defined how immersive audio is crafted and experienced in VR and AR both now and in the future. We’re proud to see the impact our work has had on so many great projects. Now, we’re ready to take the next step on our journey and scale our work from within Facebook. There is so much still to explore. By joining with a company that shares our values and our vision, we will be able to scale our technology even quicker as we continue powering immersive audio experiences.”
Already the proud parent Oculus Rift since 2014, and Gear VR with Samsung, Facebook once again dedicates valuable resources to enhancing audio effects in the virtual reality sphere. While VR products like Samsung’s Gear Headset and Facebook’s Oculus Rift receive positive reviews and the user count being especially high this year with the Gear reaching over one million, the amount of media and software in this field is far below anticipated.
The startup previously owned two audio products created as solutions for cinematic VR/360 video and gaming. With the purchase of Two Big Ears, Facebook transformed one of these products, cinematic VR/360 video into the “Facebook 360 Spatial Workstation. This software is designed to “make VR audio succeed across all devices and platforms” and furthermore is available to the public with no price tag attached. With the release of this new program, it would not only make content creators happy, but also encourage them to develop and enhance their experiences with the audio specifics already readily available to them.
Wearable future Tech Meetup recap
Wearable tech enthusiasts, pizza, beer, what could be better? On Tuesday May 24th , we had t
he pleasant opportunity to host a Wearable Tech Meetup at one of the most innovative spaces for entrepreneurs, the Samsung Accelerator. For those of you who aren’t familiar with the space, Samsung Accelerator “provides strategic capital, office space, operational and product support to seasoned entrepreneurs so they can build market-driven software and services.” We are thankful to Samsung Accelerator for letting us use their space and look forward to collaborating with them in the future.
This meetup was a panel discussion on The Wearable Future and it focused on the developmental process of the space and how it will develop within the next few years. With a focus towards the fashion/apparel side of things, the panel analyzed several devices including step trackers and smartwatches and their current domination in the market. They explored factors that currently limit the wearability design process including archaic battery technology due to short battery life and bulky attributes and furthermore talked about key marketing strategies behind selling a wearable tech product in its relation to the fashion industry.
Important key factors from the discussion included:
- Wearable technology doesn’t exist for users to adapt to the product, but rather to improve and advance their current lives.
- Similarly to other tech designers, wearable designers need to integrate the concept of longevity into their design process so that the intended product line can expand over time
- The fact that although many mainstream fashion brands have expressed their desire to expand into wearable technology, the possibility of the product appearing to be too cheesy and cheap might devalue the brand as a whole.
Wearable topics and companies the panelists considered to the be leading the wearable tech industry today included:
Companies:
- Meta : Meta glasses are see-through wearable glasses, in which digital content is displayed as a dynamic layer over your actual physical surroundings
- Carbon3d : Develops 3d printing solutions that integrates ideas of diverse perspectives and disciplines including software, hardware, and molecular science
Concepts:
- Smart textile application in the military (for medical and other fields)
- 3D printing of soles for shoes vs hand sewing/injection molding
- Exo-skeleton development to increase physical capabilities
The panelists that we invited to the meetup not only have years in relevant experience, but are figures leading successful companies that are currently dominating in the industry. .
Nora Levinson, President & CEO at Caeden
An experienced mechanical engineer and entrepreneur, Nora Levinson has been involved in the in the product design industry for several years.. After spending 5 years in China at several companies including Skullcandy and Jawbone, Levinson joined forces with her co-founder to create ADOPTED Inc and Caeden and still applies her management to both.
About Caeden
Technological pieces like the headphones and earphones have long since been standard within the industry. Although many companies have ventured into improving sound quality while at the same time improving the appearance, most of the time they would have to decrease the other in order to make it completely functional. Caeden however, was able to combine both elements equally delivering impeccable sound quality with a beautiful and refined finish. Their most recent release, the Sona, is a bracelet designed for performance. Connecting to the Caeden App, the Sona is an innovative wearable tech piece that takes performance bracelets to the next level by tracking your physical activity and building your resilience to stress.
Ryan Sherman, Founder & CEO at FUSAR
Ryan Sherman is doing what every little boy has dreamed of: 1: creating his own company, and (2: creating his own company in the exciting field of adventure sports. Note: change) With years of Product Engineering experience in a variety of companies, Sherman has brought with him the expertise and leadership he needed to start his own company, FUSAR, in August 2013.
About FUSAR
In regards the actual company, FUSAR is the world’s first technology ecosystem for action sports. By connecting the tech industry to the action sports sphere, FUSAR believes they can encourage more connectivity from users and help with overall safety. The product’s selling point is simple: it provides multiple advantageous features while at the same time providing flexibility in that you can use any helmet with the product. The advanced features in which it provides includes: full action camera, activity tracking, unlimited-range communication*, navigation, music playback, black box, and emergency alert capabilities. There is also an accompanying app with features such as tracking and sharing rides, chatting with friends via their push-to-talk comms, emergency alert system, and real time photo and video sharing, this app really expands the boundaries of creating a holistic social media outlet for fellow junkie riders.
Meisha Brooks, Product Manager/ Mechanical Engineer at The Crated
Engineering and fashion are two categories not usually associated with one another. For Meisha Brooks however, both aspects have remain to this day in her life. Starting off her career at Harvard for mechanical engineering, Brooks would proceed to build an impressive list of experiences covering various industries around mechanical engineering often switching between Japan and the United States. Following her position at Tradecraft as a Product Designer, Brooks then moved to The Crated, where she still works to this day.
About The Crated
Despite wearable technology focusing more on miniaturized computers on wrists these days, The Crated expands their perspective on wearable technology to even the clothes we wear. Positioning themselves as an innovation house, The Crated actively develops products, conducts proprietary research and provides insights to industry leaders with the hopes of making second generation wearable technology mainstream.
The event went over the planned time as the panelists had the audience under their wearable tech industry spell. To be part of our next meetup, join the New York Wearable Tech Meetup at www.meetup.com/WearableTechNYC
Multi-Language Support on Open edX
, we’ve provided a clear step by step solution to this.
First off, there are two possible services available that can help make an Open edX site multilingual:
- Transifex
- Localizejs
Transifex:
Officially supported by Open edX to localize edX site,s Transifex is where all translation of the Open edX framework is currently hosted. Here’s a link to their site: www.transifex.com
Here’s how you can integrate this in your code:
Section 1: Developer Stack Configurations
Step 1: Switch to edXapp environment:
- sudo -H -u edxapp bash
- source /edx/app/edxapp/edxapp_env
- cd /edx/app/edxapp/edx-platform
Step 2: Configure your ~/.transifexrc file:
- [https://www.transifex.com]
hostname = https://www.transifex.com
username = user
password = pass
token = - *Make sure the token is left blank*
Step 3: Make sure all languages you wish to download are present and uncommented in
- conf/locale/config.yaml.
Example: If you wish to download Arabic and Chinese (China), make sure your config.yaml file looks like this:
- locales:
- ar # Arabic
- zh_CN # Chinese (China)
Step 4: Configure LANGUAGE_CODE in your LMS (lms/envs/common.py). Or, for development purposes, create a dev file called dev_LANGCODE.py – eg dev_es.py – with the following:
- from .dev import *
USE_I18N = True
LANGUAGES = ( (‘es-419’, ‘Spanish’), )
TIME_ZONE = ‘America/Guayaquil’
LANGUAGE_CODE = ‘es-419’
Step 5: Configure EDXAPP_LANGUAGE_CODE in your configuration files. Here’s an example:
Step 6: Execute the following command in your edx-platform directory with your edx-platform virtualenv:
- $ paver i18n_robot_pull
- This command will pull reviewed translations for all languages that are listed in conf/locale/config.yaml.
- To only pull down some languages, edit conf/locale/config.yaml appropriately.
- To pull unreviewed translations along with reviewed translations, edit edx/app/edxapp/venvs/edxapp/src/i18n-tools/i18n/transifex.py
Note: When you launch your LMS instance you can launch it normally and things should display properly. However, if in Step 4 you created a special “dev_LANGUAGECODE” file, you’ll need to launch the LMS with the environment file explicitly stated:
- $ paver lms -s dev_es -p 8000
Note: If you experience issues along the way:
- Be sure your browser is set to prefer the language set in LANGUAGE_CODE.
- In common/djangoapps/student/views.py the user’s language code is trying to be obtained from a saved preferences file. Therefore, if you’re having issues seeing your language served up, it may be because your User object has a different language saved as a preference. Try creating a new user in your environment, this should clear up the issue.
Section 2: MultiLingual edX site
Setting the LANGUAGE_CODE enables one language as your installation’s default language. You’re probably asking: “What if you want to support more than one language? To “release” a second (or third, or hundredth) language here is a list of instructions to do so:
Step 1: First, you have to configure the languages in the admin panel.
Step 2: While the LANGUAGE_CODE variable is used to determine your server’s default language, in order to “release” additional languages, you have to turn them on in the dark lang config in the admin panel. Here’s an example link of where the dark lang config is located in the admin panel:
YourAwesomeDomain.com/admin/dark_lang/darklangconfig/
Step 3: After this, add the language codes for all additional languages you wish to “release” in a comma separated list. For example, to release French and Chinese (China), you’d add fr, zh-cn to the dark lang config list.
Note: You don’t need to add the language code for your server’s default language, but it’s certainly not a problem if you do.
Note: Remember that language codes with underscores and capital letters need to be converted to using dashes and lower case letters on the edX platform. For example the language code of Chinese (Taiwan) is “zh_TW” on Transifex, but “zh-tw” on the edX system.
Confusing? I know. However, the benefits definitely outweigh the initial confusion. Benefits include that you can preview languages before you release them by adding: ?lang-code=xx to the end of any url, and ?clear-lang to undo this. Here’s an example:
- 127.0.0.1:8000/dashboard?preview-lang=fr #French
- 127.0.0.1:8000/dashboard?clear-lang #Sets the site back to default language
Section 3: Full stack Configurations
For a Local Full stack installation, follow Step One and Two from the Devstack deployment section and then follow these steps:
Option 1: If you only need to pull translations of one language, simply execute the following command in your edx-platform directory with your edx-platform virtualenv:
- $ tx pull -l <lang_code>
- *The <lang_code> here should be replaced by the language code on Transifex of the language you want to pull (for example, zh_CN for Chinese (China)).
Note: This option will overwrite the .po files located in conf/locale/<lang_code>/LC_MESSAGES with the contents retrieved from Transifex, so please only do this step when Transifex is newly installed or when you really want a new version of translation from Transifex.
Option 2: If you already have your own changes of edX-platform’s source code in your local installation or the source files on Transifex is not up-to-date, you may need to extract strings manually. The following steps below will show you how:
Step 1: Execute the following command in your edx-platform directory with your edx-platform virtualenv:
- $ paver i18n_extract
- This command will extract translatable strings into several .po files located in the conf/locale/en/LC_MESSAGES.
Step 2: After this extraction process, you can merge the newly extracted strings into the corresponding .po files located in conf/locale/<lang_code>/LC_MESSAGES (except django.po and djangojs.po, which are generated by i18n tools automatically from other .po files).
Step 3: Edit the .po file and then recompile them using: $ paver i18n_fastgenerate
Note: If you want to change the default language code of a Full Stack, you can modify the value of LANGUAGE_CODE inside lms.env.json and/or the cms.env.json located in /edx/app/edxapp before restarting your Full Stack.
Result: After completing these steps, you should see updated translations. If for some reason they don’t show up, try to restart the nginx server and/or clear your browser’s cache.
Localizejs:
Localize is a promising and insanely easy-to-use service that runs on your website by executing from a one-line JavaScript snippet. This one line of code will load Localize on your site and automatically change the language based on the language preference of visitors.
How it works:
By loading Localize code onto your website, it can:
- Identify text on your website,
- Replace text with translations, when available,
- Adapt the text for pluralization and variables,
- Order translations for unrecognized content,
- Help you go global!
The Localize library translates the phrases on your pages and sends unrecognized phrases to the Localize dashboard for later translation. On the Localize dashboard, you can:
- View content and translations
- Add or remove languages
- Translate content
- Order translations (machine or human)
Steps for using localizejs:
Integrating localizejs is a very straightforward process:
Step 1: Create a project account on localizejs.com. As a result, a localized code snippet with project id is generated.
Step 2: Add this code snippet to the header file of the website.
for eg: 1) main.html
2) django_main.html
Results: After reloading the page, a toggle menu bar will appear on the page with languages ts hat you selected in your localizejs account. This enables users to select a language of his/her choice. And as soon as they do this, bingo, the language on all pages that have the snippet is changed based on the user’s choice.
Afterthoughts:
Following the successful installation of either of the two services, the sheer number of languages provided makes the whole process worth it. From Arabic to Swahili, both of these solutions provide an astounding 93 languages in total. When you’re trying to attract customers from around the world, comprehensibility plays a critical role in this. By integrating multiple languages on an edX site, not only is it a huge step towards fixing localization issues, but you’re developing a higher standard of consideration towards your visitors.
Reference: https://github.com/edx/edx-platform/wiki/Internationalization-and-localization

